How Does Projection Mapping Work? A Step-by-Step Guide
How does projection mapping work? It combines projectors, digital content, and specialised software to transform physical surfaces into dynamic visual displays. Instead of displaying images on a traditional flat screen, projection mapping aligns visuals with the shape and features of real-world objects, buildings, and architectural structures.
From transforming building façades to creating immersive museum exhibitions, projection mapping brings digital content into physical spaces. It combines creative storytelling with carefully planned technology to produce engaging visual experiences.
In this guide, we explain how projection mapping works, what equipment it requires, and the key steps involved in creating a successful projection mapping installation.
What Is the Projection Mapping Process?
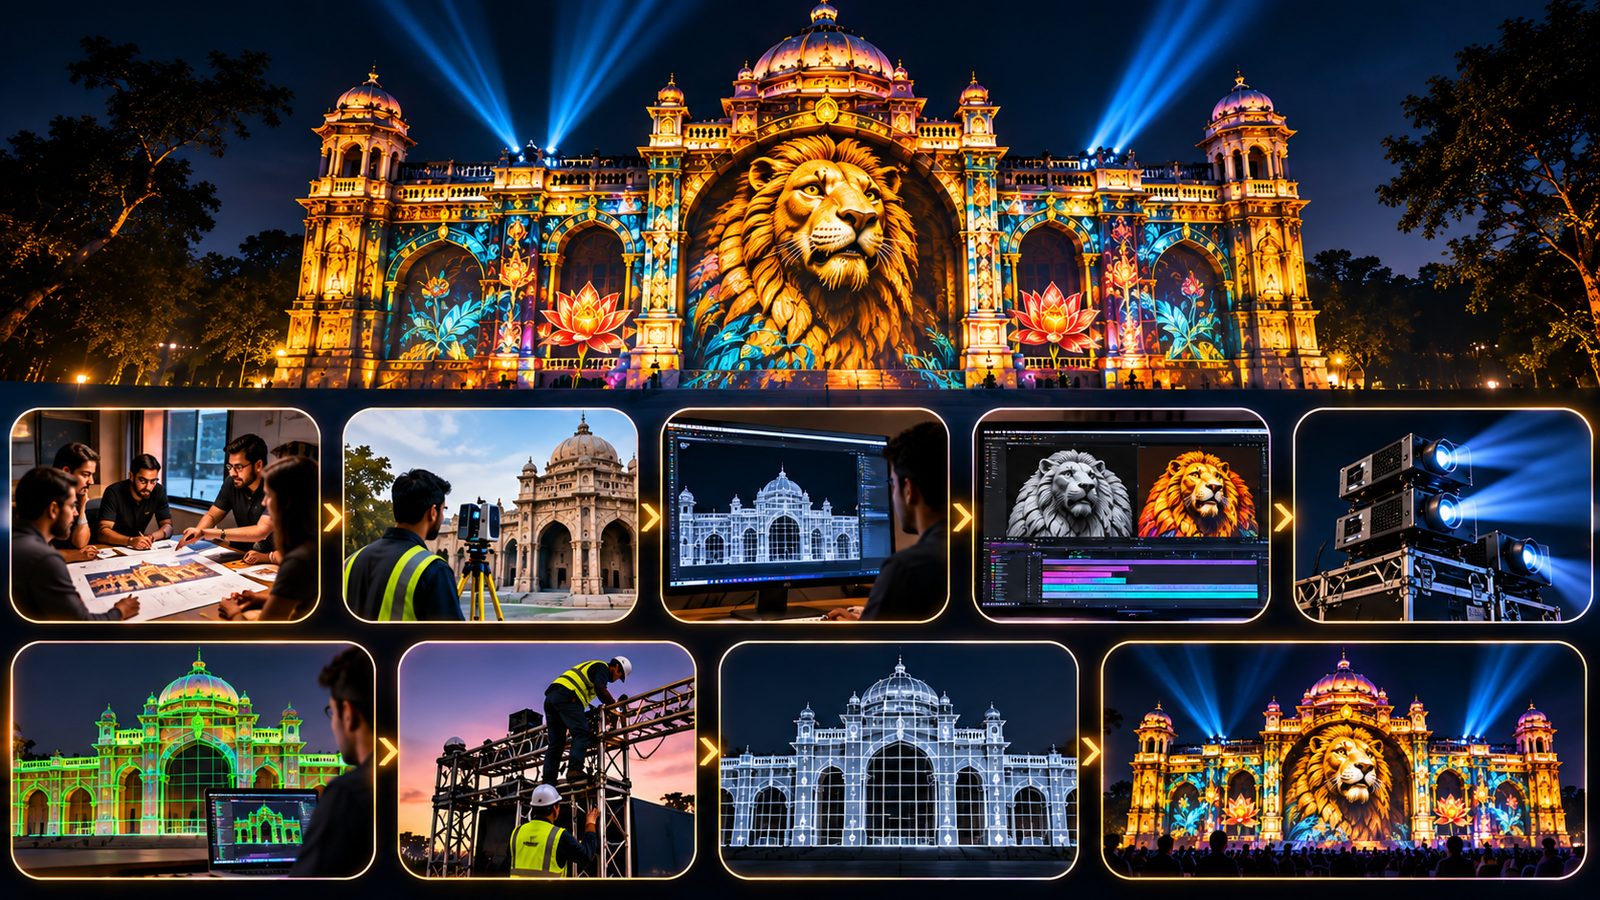
The projection mapping process involves several stages, including surface analysis, projector selection, content creation, image alignment, and final calibration.
Each stage plays an important role in ensuring that the projected visuals fit the physical surface and deliver the intended experience.
For example, when creating an architectural projection mapping show, the creative team must understand the building’s dimensions, design suitable animations, select appropriate projectors, and align the content with the building’s architectural features.
Let’s look at each step in detail.
1. Surface Measurement and Analysis
The first step in any projection mapping installation is understanding the surface where the content will appear.
This could be a building façade, a historical monument, a museum exhibit, a sculpture, or an entire room. The team studies the surface’s dimensions, shape, colour, texture, and architectural details before planning the projection setup.
For architectural projection mapping, elements such as windows, columns, balconies, and entrances are particularly important. The visual content must align with these features to create convincing effects.
A site survey also helps determine the available projector positions, viewing distances, potential obstructions, and environmental conditions.
Accurate surface analysis helps the team plan the content, estimate equipment requirements, and identify technical challenges before installation begins.
2. Choosing the Right Projector
Projector selection is one of the most important technical decisions in projection mapping.
The right projector depends on the size of the surface, ambient lighting, viewing distance, required image quality, and installation conditions.
Several factors need to be considered:
Brightness: The projector must provide sufficient light for the environment and projection surface.
Resolution: Higher resolution can help deliver sharper details, particularly on large surfaces viewed from relatively close distances.
Throw distance: The distance between the projector and the surface affects image size and coverage.
Lens selection: The lens determines how the projector fits the image into the available space.
Surface coverage: Large or complex installations may require multiple projectors.
Outdoor projection mapping requires particular attention to ambient light. A projector that performs well in a dark room may not deliver the same perceived contrast on a building façade in a brightly lit environment.
The goal is to select equipment that meets the project’s creative and technical requirements without unnecessary expense.
3. Creating the Visual Content
Once the surface and projection requirements are understood, the creative team begins developing the content.
This stage may involve animation, motion graphics, 3D modelling, compositing, visual effects, and sound design.
Unlike a standard video, projection mapping content is designed with the physical surface in mind. The animation should use the object’s shape, dimensions, and features to enhance the visual experience.
For example, an architectural projection mapping sequence might make a building appear to crack open, reveal hidden structures, or transform into a different architectural style.
In a museum, projected animations might illustrate how a historical monument was constructed or demonstrate how a machine works.
The creative approach depends on the project’s purpose, audience, and environment.
Good projection mapping content does more than look impressive. It uses the physical surface to communicate a story or idea.
4. Mapping the Content to the Surface
After the content has been created, it must be aligned with the physical structure.
This is where projection mapping software becomes essential.
The software allows operators to adjust image position, perspective, geometry, and masking so that the projected content appears in the correct locations.
For example, if a building has several windows and columns, the content can be designed to interact with these architectural elements. An animation might make a window appear to open or use a column as part of a visual transition.
This process involves techniques such as warping and masking.
Warping adjusts the geometry of the image to match the projection surface, while masking restricts the projected content to selected areas.
Accurate mapping helps make the digital visuals appear connected to the physical structure rather than simply projected onto it.
5. Using Multiple Projectors
Not every projection mapping project requires multiple projectors. Smaller installations may work well with a single projector, while larger or more complex surfaces may require several.
Multiple projectors can help cover a large façade, an immersive room, or a structure with challenging geometry.
However, their images must be aligned carefully to prevent visible gaps, overlaps, or mismatched details.
Two techniques are particularly important.
Image Warping
Warping adjusts the projected image’s geometry so that it fits the intended surface.
It is useful when the projector cannot be positioned directly in front of the surface or when the target area has an irregular shape.
Edge Blending
Edge blending combines overlapping images from multiple projectors to create a continuous visual display.
Without proper blending, the boundaries between projected images may appear as visible lines or differences in brightness.
These techniques are especially useful for large architectural installations, immersive environments, and dome projection systems.
6. Playback and Synchronisation
Once the content has been mapped and aligned, a playback system is needed to deliver it to the projectors.
Depending on the installation, this may involve a computer, a dedicated media server, or a professional playback system capable of handling multiple video outputs.
Larger projects may also require synchronisation between projection, audio, lighting, and other show elements.
For example, an outdoor projection mapping show might coordinate architectural animations with music and lighting effects. A museum installation might combine projected visuals with narration or interactive elements.
Reliable playback is essential because technical interruptions can affect the audience experience.
The playback system should therefore be selected according to the project’s resolution, number of outputs, content format, and operational requirements.
7. Testing and Final Calibration
The final stage is testing the installation in the actual environment.
Even carefully prepared content may require adjustments once the projectors are installed. Differences in projector position, ambient lighting, surface colour, and viewing angles can affect the final result.
During calibration, the team checks:
Image alignment and geometric accuracy.
Brightness and contrast.
Focus and image sharpness.
Colour consistency.
Overlapping projector outputs.
Playback reliability.
Visibility from the intended audience positions.
Outdoor installations also require suitable protection against relevant weather and environmental conditions.
Testing the complete system before the event or installation opens helps identify problems early and ensures that the creative concept works as intended.
What Equipment Is Used in Projection Mapping?
A projection mapping installation usually combines several hardware and software components.
Projectors
Projectors display the digital content onto the physical surface. Their brightness, resolution, lens options, and positioning depend on the project requirements.
Projection Mapping Software
Mapping software helps align, warp, and mask the projected content. Different software solutions offer different capabilities, so the appropriate choice depends on the installation.
Media Servers and Playback Systems
These systems manage video playback and, where necessary, multiple projector outputs and synchronisation.
Content Creation Software
Creative teams use animation, 3D, compositing, and video production tools to develop content for the projection surface.
Audio and Lighting Systems
Some installations combine projection with sound, lighting, and other effects to create a coordinated experience.
The exact equipment configuration varies depending on the surface, content, venue, and scale of the installation.
What Factors Affect Projection Mapping Quality?
The quality of a projection mapping installation depends on several factors working together.
Ambient light: Surrounding light affects perceived brightness and contrast.
Surface characteristics: Colour, texture, reflectivity, and geometry influence how the projected content appears.
Projector placement: Position, throw distance, and lens selection affect image coverage and alignment.
Content quality: Well-designed animation uses the surface’s features effectively and supports the intended message.
Viewing distance: The audience’s position affects image detail, perspective, and the visibility of visual effects.
Technical calibration: Accurate alignment is essential, especially when multiple projectors are used.
System reliability: Stable playback, suitable equipment, and proper testing help prevent interruptions.
Addressing these factors during planning makes it easier to achieve the desired result.
Where Is Projection Mapping Used?
Projection mapping can be adapted to a wide range of environments and applications.
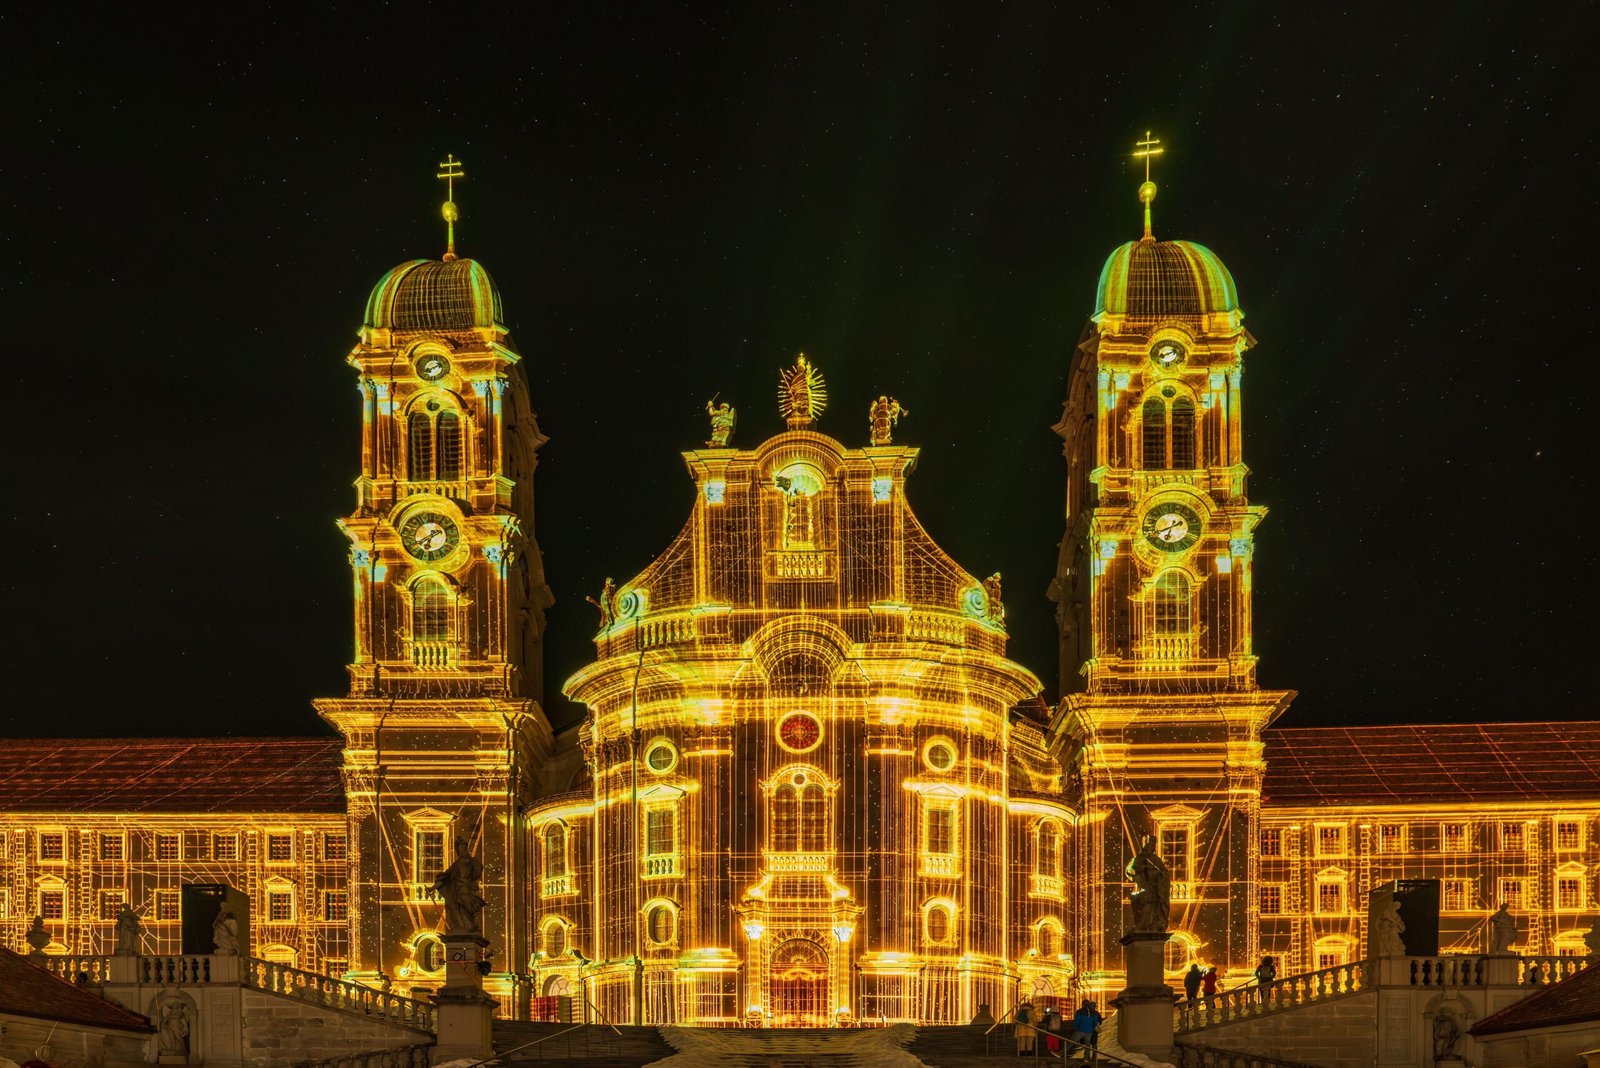
Architectural and Monument Mapping
Buildings and monuments can become large visual canvases for storytelling, cultural celebrations, tourism attractions, and public events.
Museum Projection Mapping
Museums use projection mapping to animate exhibits, explain historical events, and communicate complex information through visual storytelling.
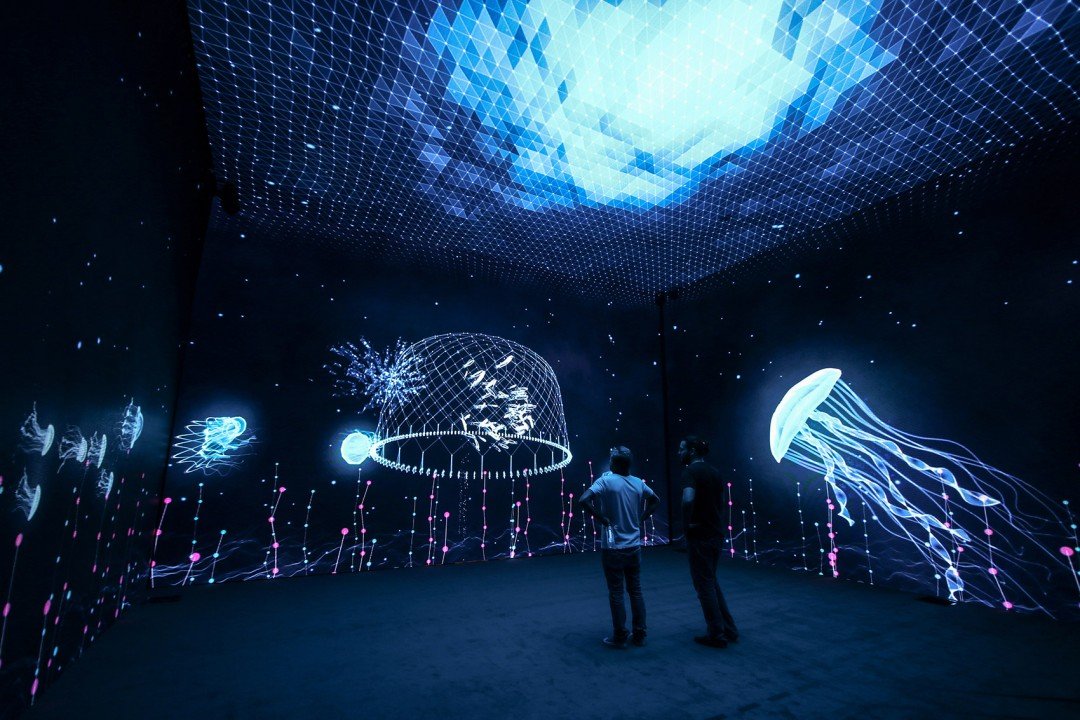
Immersive Rooms
Immersive projection creates digital environments across walls, floors, and ceilings, making it suitable for exhibitions, entertainment, and brand experiences.
Dome and 360° Experiences
Dome projection displays content across curved surfaces to create panoramic experiences for education, entertainment, and immersive storytelling.
Water Projection
Water projection uses specially created water screens or mist to display animations and videos at outdoor events and attractions.
Each application requires a projection setup and content workflow designed for its particular environment.
How Much Does a Projection Mapping Installation Cost?
The cost of projection mapping depends on the scale and complexity of the project.
A small object-mapping installation requires a different setup from a large architectural show involving multiple high-brightness projectors, original animation, and a professional playback system.
The main cost factors include:
Projector quantity and specifications.
Lens requirements and mounting arrangements.
Animation and 3D content production.
Mapping software and playback equipment.
Installation and calibration.
Site access and technical infrastructure.
Audio, lighting, and synchronisation requirements.
Project duration and operational support.
For an accurate estimate, the project team should understand the surface dimensions, location, creative objectives, expected viewing conditions, and installation timeline.
A site survey and clear project brief help determine the most suitable technical approach and budget.
How Visual GAP Approaches Projection Mapping
At Visual GAP, we work across projection mapping and immersive media, bringing together creative storytelling, visual content, and technical planning.
Every installation begins with understanding the physical space, the project’s objectives, and the experience intended for the audience.
These requirements help guide decisions about projector selection, content development, mapping, playback, and installation.
From architectural and monument mapping to museum projection, dome and 360° experiences, water projection, and immersive rooms, each project needs an approach tailored to its environment.
By considering creative and technical requirements from the beginning, a projection mapping team can identify potential challenges and develop a solution suited to the space.
Planning a projection mapping project? Contact Visual GAP to discuss your venue, creative vision, and technical requirements.
Frequently Asked Questions About Projection Mapping
1. How does projection mapping work in simple terms?
Projection mapping uses projectors to display specially designed visuals on physical surfaces. Mapping software helps align the content with the surface’s shape, creating the appearance that the visuals are part of the object or structure.
2. What software is used for projection mapping?
Specialised projection mapping software helps operators manage image alignment, warping, masking, and playback. The software depends on the complexity of the project and the equipment being used.
3. Does projection mapping require 3D animation?
No. Projection mapping can use 2D graphics, video, motion graphics, or 3D animation. The choice depends on the surface, creative concept, and desired visual effects.
4. Can projection mapping use multiple projectors?
Yes. Multiple projectors can cover large or complex surfaces. Their images must be aligned, and edge blending may be used to create a continuous display.
5. Can projection mapping be used outdoors?
Yes. Outdoor projection mapping is commonly used on buildings, monuments, and event structures. Brightness, projector placement, weather protection, surface characteristics, and site conditions must be considered.
6. What is the difference between projection mapping and normal projection?
Normal projection typically displays content on a flat screen or wall. Projection mapping adapts digital content to the shape and geometry of a physical surface.
7. How long does a projection mapping project take?
The timeline depends on the surface, content complexity, equipment requirements, site access, and calibration. A small installation may take less preparation than a large architectural show or permanent museum installation.
8. How much does projection mapping cost?
Costs vary according to projector requirements, content production, installation complexity, equipment, and project duration. A site assessment and project brief help establish a suitable budget.
9. Is projection mapping suitable for museums?
Yes. Museums can use projection mapping to animate exhibits, explain historical events, visualise scientific concepts, and create engaging educational experiences.
Conclusion
Projection mapping works by combining projectors, digital content, mapping software, and accurate calibration to transform physical surfaces into dynamic visual displays.
From measuring a surface and creating custom animations to aligning images and testing the playback system, every stage contributes to the final experience.
The most successful installations combine creative storytelling with careful technical planning. When these elements work together, projection mapping can turn buildings, monuments, museum exhibits, and immersive spaces into engaging visual environments.
Explore projection mapping with Visual GAP to discover how creative content and technical expertise can bring your next project to life.