How to Plan a Monument Projection Mapping Project
Planning a monument projection mapping project requires a combination of creative vision, architectural understanding, technical expertise, and careful coordination. From selecting projectors to developing the visual narrative, every decision affects the final experience.
Whether the project involves a historic fort, temple, memorial, heritage building, or cultural landmark, proper planning helps create a visually compelling show while respecting the structure and its surroundings.
In this guide, we explain the essential steps involved in planning a successful monument projection mapping project.
1. Define the Project Objectives
Before selecting equipment or developing content, establish what the projection mapping experience should achieve.
A monument mapping project may be designed for:
Heritage storytelling and historical interpretation
Tourism and evening attractions
Cultural festivals and public events
Educational experiences
Commemorative shows
Permanent architectural projection installations
The objective determines the content style, show duration, technical requirements, audience experience, and overall budget.
For example, a historical storytelling show may require detailed research and narration, while a cultural event may focus more on music, animation, and visual spectacle.
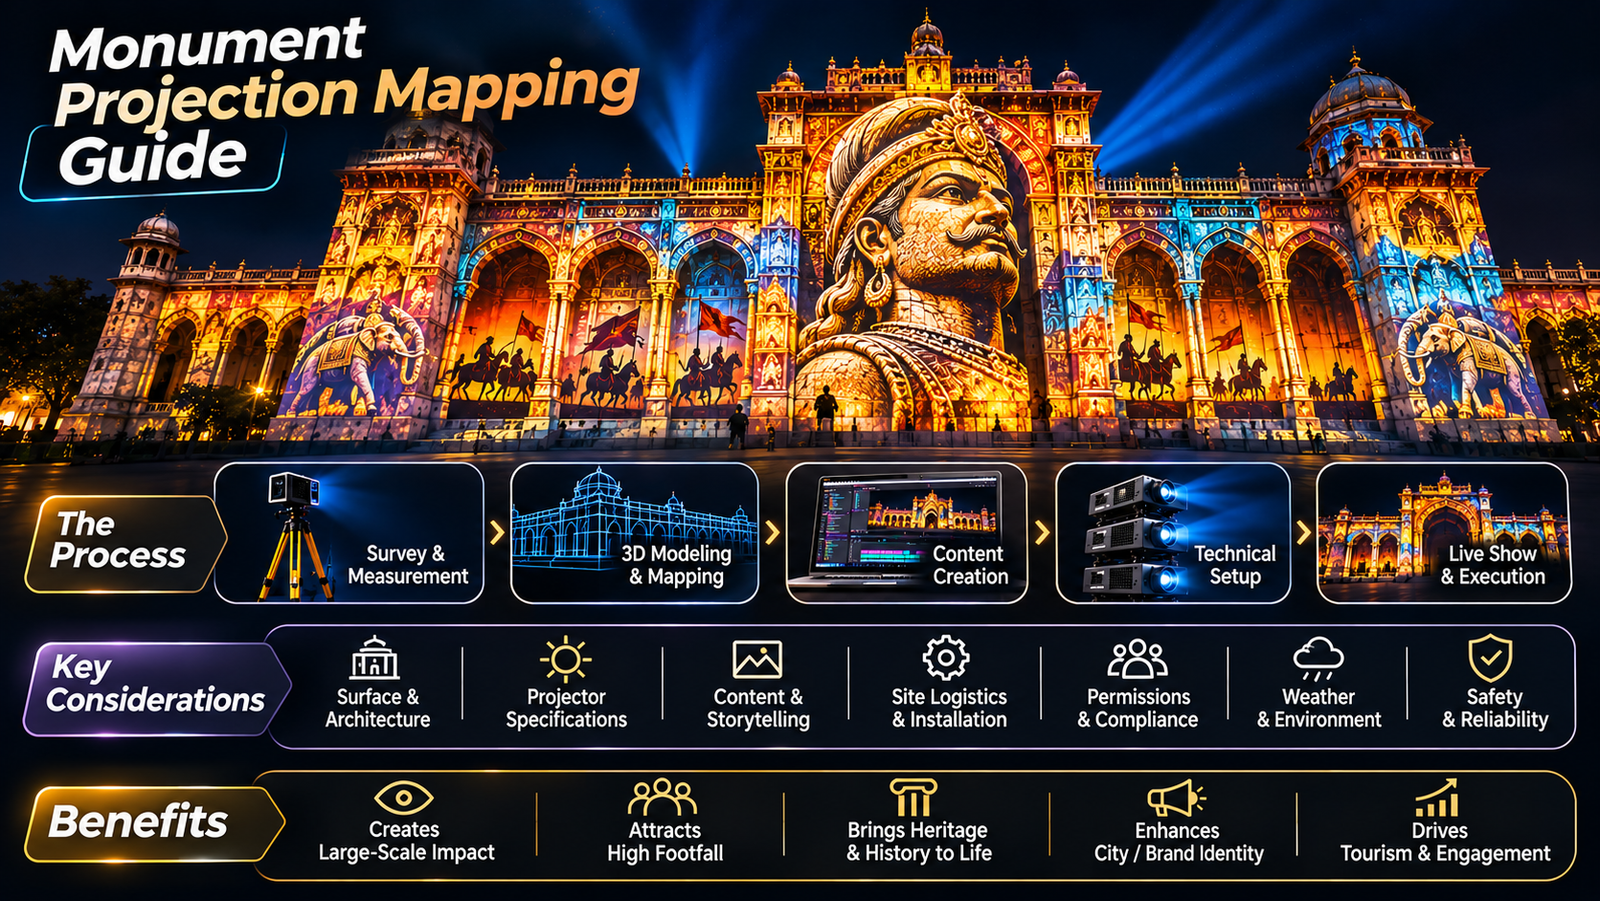
For a broader introduction, read our Monument Projection Mapping Guide.
2. Conduct a Detailed Site Survey
A site survey is one of the most important stages of monument mapping.
The project team needs to understand the physical structure, available installation locations, surrounding environment, and audience viewing conditions.
Important considerations include:
Monument height, width, and architectural geometry
Columns, arches, windows, recesses, and decorative features
Available projector installation positions
Distance between projectors and the monument
Trees, buildings, poles, and other obstructions
Ambient lighting and nearby light sources
Audience viewing areas and sightlines
Power availability and cable routes
Access for installation and maintenance
Photographs, architectural drawings, measurements, and 3D references can help the team understand the structure before content production begins.
For complex structures, a more detailed digital model may be useful for visualisation and mapping preparation.
3. Analyse the Monument’s Architecture
The architecture should influence the creative approach.
A flat facade may allow relatively straightforward content alignment, while a structure with deep recesses, domes, columns, and irregular surfaces requires more careful planning.
The content team should identify architectural features that can become part of the story.
For example:
Windows can appear to open or reveal another environment.
Columns can become visual transitions between historical periods.
Decorative sections can be highlighted through animated textures.
Large central surfaces can carry important narrative moments.
Architectural edges can support illusions of movement and transformation.
The strongest results come when the animation is designed around the actual monument rather than treating the building as an ordinary screen.
4. Choose the Right Projectors
Projector selection depends on the size of the structure, ambient light, projection distance, required image quality, and content design.
Brightness
Large outdoor structures often require high-brightness projectors, but there is no universal lumen specification for every monument.
The required brightness depends on the projection area, environmental light, surface colour, content contrast, and number of projectors.
Resolution
Resolution affects how clearly fine architectural details, text, and animation appear.
The appropriate resolution depends on the viewing distance, projected image size, and creative requirements.
Lens and Throw Distance
The lens must match the available installation distance and the required image size.
Incorrect lens selection can create problems with coverage, focus, and projector placement.
Number of Projectors
Large monuments may need several projectors to cover the entire facade or achieve the desired brightness.
Projector quantity should be determined through coverage planning and technical calculations rather than monument size alone.
5. Plan Projector Placement and Coverage
Projector placement affects image geometry, brightness, shadows, and the overall visual result.
The team should determine the most suitable locations and check whether nearby structures or architectural features will obstruct the light.
When multiple projectors are used, their images may need to overlap for edge blending or complete surface coverage.
The planning process should account for:
Projection angles
Throw distance
Lens specifications
Image overlap
Shadow zones
Access and installation safety
Weather protection
Maintenance requirements
Previsualisation and on-site testing help identify problems before the final show.
6. Develop the Content and Storyline
Technology alone does not make a monument mapping show successful. The content needs a clear purpose and a coherent narrative.
For heritage projects, research should be conducted using reliable historical references and, where appropriate, consultation with subject-matter experts.
A typical show may include:
Introduction to the monument
Historical background
Important events or transformations
Cultural or architectural significance
A visual climax
A closing sequence
The exact structure depends on the monument and the project’s objectives.
Content production may involve 2D animation, 3D modelling, visual effects, motion graphics, historical reconstruction, and sound design.
Every sequence should be designed around the monument’s geometry and the intended audience viewpoint.
7. Select the Mapping and Playback Workflow
Projection mapping software helps align digital content with the physical structure. Media servers or suitable playback systems manage the show and coordinate content across multiple projectors.
The workflow depends on the scale and complexity of the installation.
A smaller project may use a relatively simple playback arrangement, while a large-scale show may require:
Multiple synchronised outputs
Edge blending
Image warping
Media server configuration
Audio synchronisation
Playback monitoring
Backup and recovery procedures
Test the complete playback workflow before the public launch.
8. Plan Audio and the Audience Experience
Sound can strengthen the emotional impact of a monument mapping show.
Depending on the concept, audio may include narration, music, sound effects, and ambient elements.
The team should consider audience capacity, speaker placement, sound coverage, local noise conditions, and applicable sound restrictions.
Viewing areas should also provide clear sightlines to the monument.
If the show includes narration, the pacing and volume should allow visitors to follow the story comfortably.
9. Address Permissions and Heritage Conservation
Historic monuments may be subject to strict conservation rules and operational restrictions.
Before installation, identify the relevant authorities, site managers, owners, and approval requirements.
Planning should consider:
Permission for projector installation
Restrictions on attaching equipment to historic structures
Power and cable routing
Public safety and crowd management
Environmental and weather-related risks
Sound and operating-hour restrictions
Protection of architectural surfaces
Installation methods should be selected to respect the monument’s conservation requirements and avoid unnecessary physical alterations.
Do not assume that permission to access a site automatically includes permission to install projection equipment or conduct a public show.
10. Estimate the Project Budget
The budget should account for both creative production and technical execution.
Common cost components include:
Site survey and technical design
Projectors, lenses, and related equipment
Media servers and software
Custom content production
Audio systems
Mounting, rigging, and cabling
Transportation and accommodation
Installation and calibration
Testing and rehearsals
Operation, maintenance, and technical support
Equipment rental, project duration, content complexity, and installation conditions can significantly affect the total cost.
For a more detailed overview, read our guide on How Much Does Projection Mapping Cost?.
11. Test the Complete Show Before Launch
A full technical rehearsal helps the team identify issues that may not be apparent during content creation.
During testing, check:
Alignment between animation and architecture
Image focus and brightness
Projector overlap and blending
Playback synchronisation
Audio quality
Visibility from audience areas
Cable management and equipment safety
Recovery procedures for technical failures
If possible, test under lighting conditions similar to those expected during the actual show.
Documenting the final settings can also make future maintenance and recalibration easier.
Common Mistakes to Avoid
Several planning mistakes can affect the final result:
Selecting projectors before completing the site survey
Creating content without considering architectural geometry
Ignoring ambient light and surface characteristics
Underestimating installation and calibration time
Overlooking permissions and conservation requirements
Failing to plan for weather and equipment protection
Leaving insufficient time for full-scale testing
Prioritising visual effects over a coherent story
Addressing these issues early can reduce rework and help the project stay aligned with its objectives.
Conclusion
Planning a monument projection mapping project requires creative development, technical design, equipment selection, site coordination, and careful testing.
The most successful projects begin with a clear objective and a detailed understanding of the monument. The content, projection system, audio, and visitor experience should then be developed as parts of one integrated solution.
At Visual GAP, we bring together visual storytelling, projection planning, content production, and technical expertise to develop projection-based experiences for monuments, heritage environments, museums, and immersive spaces.
A well-planned project can transform a historic structure into a compelling storytelling environment while respecting its architectural and cultural significance.
Frequently Asked Questions
How do you start a monument projection mapping project?
Start by defining the project’s objectives, conducting a site survey, studying the architecture, identifying approval requirements, and assessing the technical and creative requirements.
How many projectors are needed for monument mapping?
The number depends on the structure’s dimensions, geometry, projection distance, brightness requirements, and desired coverage. A technical survey is necessary to determine the configuration.
How long does monument mapping content production take?
The timeline depends on research, animation complexity, approvals, technical previsualisation, and revisions. Larger shows with detailed historical reconstruction generally require more production time.
Can projection mapping damage historic monuments?
Projection itself does not normally require physical changes to the illuminated surface, but equipment installation and associated infrastructure can create risks. The project must follow the site’s conservation rules and use approved installation methods.
What is the most important part of monument mapping planning?
There is no single factor that determines success. Site analysis, content quality, equipment selection, calibration, permissions, and operational planning all contribute to the final result.