Projection Mapping Project Planning: A Step-by-Step Guide
A successful projection mapping project requires more than powerful projectors and creative visuals. It needs careful planning, the right equipment, well-designed content, and precise technical execution.
Whether you are planning a building projection mapping show, a museum installation, a corporate event, or an immersive experience, preparing in advance can help you avoid technical problems and unnecessary expenses.
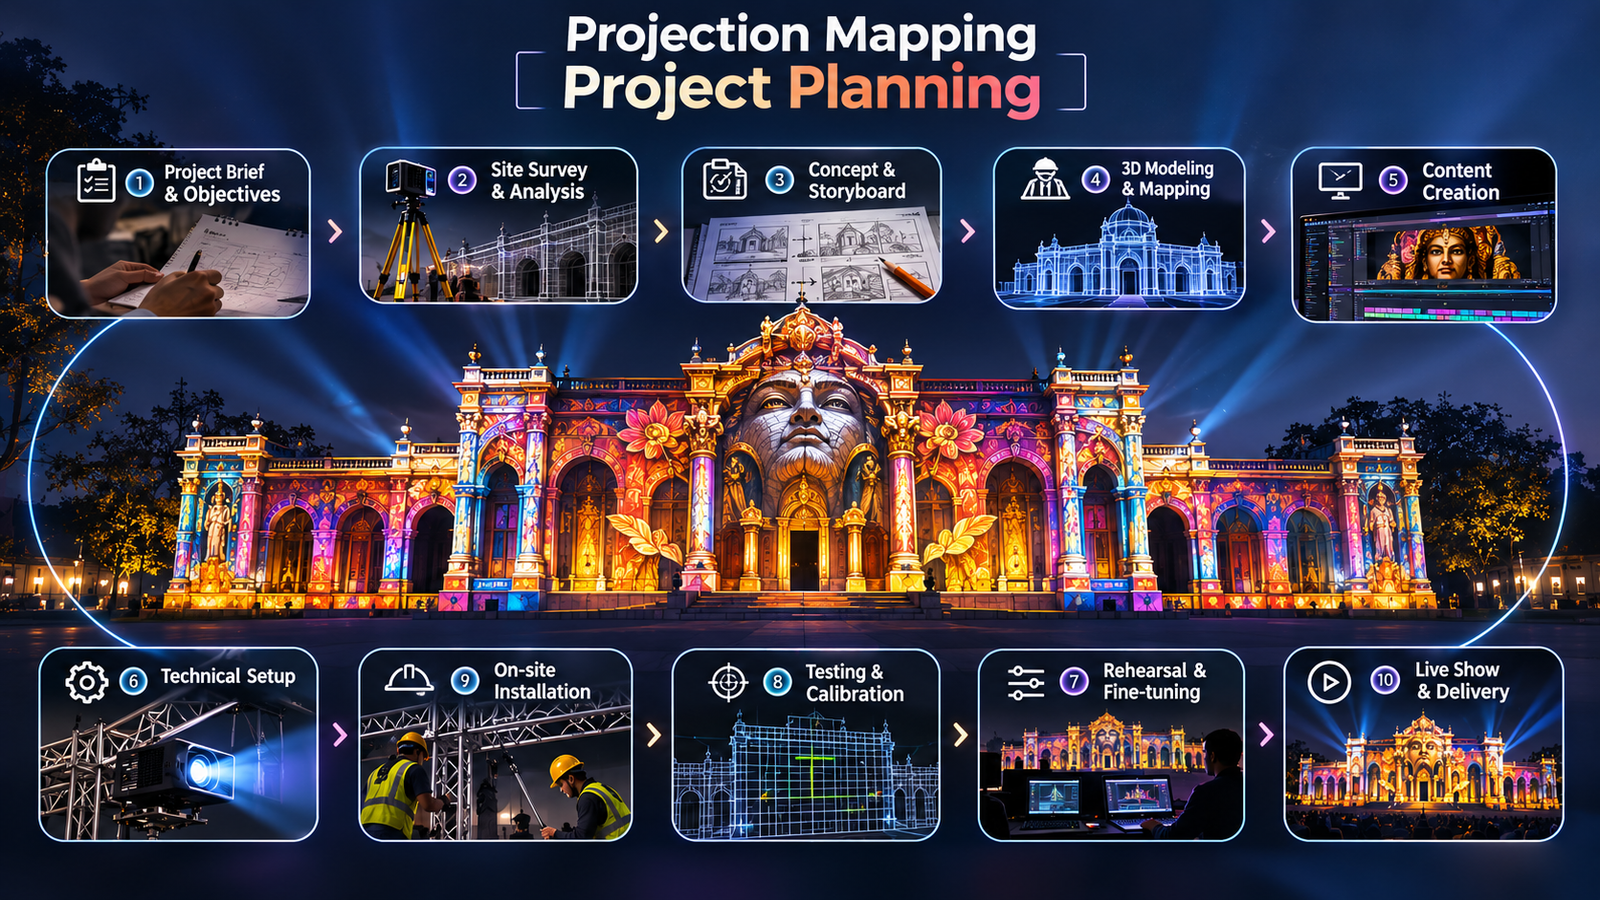
In this guide, we explain how to plan a projection mapping project, from defining your concept to installing the equipment and running the final show.
1. Define Your Project Goals
Start by identifying what you want your projection mapping installation to achieve.
For example, your objective might be to tell a historical story, transform a building during an event, showcase a product, or create an interactive museum experience.
Your goal will influence the creative concept, equipment requirements, content production, and overall budget.
Before moving forward, establish:
The purpose of the installation
The target audience
The venue and projection surface
The expected show duration
The event dates
The approximate budget
A clear brief helps the creative and technical teams work towards the same objective.
2. Survey the Location
A site survey is one of the most important stages of projection mapping project planning.
The team should examine the projection surface, measure its dimensions, assess the available space, and identify suitable projector positions.
Important factors include:
Surface width, height, and geometry
Ambient light and surrounding illumination
Projection distance and viewing angles
Trees, pillars, or other obstructions
Available power and cable routes
Equipment mounting locations
Audience positions and safety requirements
For outdoor installations, weather protection, access restrictions, and site permissions may also need consideration.
A proper site survey helps determine whether the proposed concept is technically achievable.
3. Choose the Right Projectors and Equipment
The equipment should be selected according to the venue and the desired visual result.
Projector brightness is important, but it is not the only consideration. Resolution, lens compatibility, throw distance, surface characteristics, and ambient light also affect performance.
Depending on the project, the setup may require:
Professional projectors
Suitable projection lenses
Media servers or playback computers
Projection mapping software
Signal cables and distribution equipment
Mounting structures and accessories
Backup equipment where necessary
A small indoor installation may work with a simple setup, while a large monument show could require multiple projectors and a more advanced playback system.
Avoid selecting equipment before understanding the actual site conditions.
4. Plan the Projection Mapping Content
Creative content should be planned alongside the technical setup rather than treated as a separate final step.
The content needs to suit the surface, project objectives, audience, and available equipment.
Depending on the project, content production may include concept development, storyboarding, 2D animation, 3D animation, motion graphics, visual effects, and sound design.
For architectural projection mapping, the content must be designed around the building’s geometry and architectural features.
For museums, the focus may be on storytelling and educational visuals. For product launches, the content may emphasise brand identity and dramatic reveals.
Before production begins, confirm the show duration, visual style, delivery format, approval process, and number of revisions.
5. Create a Realistic Budget
A projection mapping budget should include both creative production and technical execution.
Common expenses include:
Projector rental or purchase
Lenses and playback equipment
Content creation
Installation and calibration
Technical crew
Transportation and accommodation
Power distribution and cabling
Rehearsals and show operation
Dismantling and equipment return
The final cost depends on the project’s scale, duration, location, equipment specifications, and creative complexity.
For accurate budgeting, request a quotation that clearly identifies the included services and any additional charges.
You can also read our guide on how much projection mapping costs to understand the main pricing factors.
6. Prepare the Site and Install the Equipment
Once the design and equipment are finalised, the installation team can prepare the venue.
This stage may involve positioning projectors, installing mounts, routing cables, configuring playback systems, and checking power and signal connections.
The team must also ensure that equipment is securely installed and that cables and technical areas do not create hazards.
Installation time depends on the size and complexity of the project. A simple indoor setup may require limited preparation, while a large architectural installation can require detailed coordination and extensive testing.
Always allow sufficient time for technical adjustments before the event begins.
7. Map, Calibrate, and Test
After installation, the projected images must be aligned with the physical surface.
The mapping process involves matching the content to the dimensions and geometry of the projection area. For multi-projector setups, the team may also need to configure image blending, warping, and synchronised playback.
Before the final show, test:
Image alignment and coverage
Brightness and contrast
Content playback and timing
Audio synchronisation, if applicable
Signal connections and power stability
Backup systems, where available
Performance under actual lighting conditions
For outdoor projection mapping, conduct testing in conditions similar to those expected during the event.
A technical rehearsal helps identify issues before the audience arrives.
8. Coordinate the Team and Show Schedule
Projection mapping often involves creative, technical, production, and venue teams working together.
Assign clear responsibilities for content approvals, equipment installation, playback operation, safety, and event coordination.
Prepare a schedule covering equipment delivery, installation, calibration, rehearsals, show operation, and dismantling.
For larger projects, keep communication channels clear and establish a process for handling last-minute changes.
Good coordination helps the team respond quickly to technical issues without disrupting the overall experience.
9. Common Projection Mapping Planning Mistakes
Avoid these common mistakes when planning your installation:
Skipping the site survey: Incorrect measurements or overlooked obstructions can create serious technical problems.
Choosing projectors based only on brightness: Lens requirements, resolution, projection distance, and ambient light are equally important.
Starting content production too late: Content designed without considering the actual surface may require expensive revisions.
Underestimating installation time: Complex setups need adequate time for alignment, calibration, and testing.
Ignoring additional costs: Transportation, mounting equipment, technical crew, and dismantling should be included in the budget.
Not testing the complete system: A full rehearsal helps identify playback, alignment, and synchronisation issues before the show.
Conclusion
Successful projection mapping project planning brings together creative vision, technical preparation, realistic budgeting, and careful execution.
Start with a clear objective, survey the location, select suitable equipment, plan the content, and allow enough time for installation and testing.
Whether you are developing an architectural show, a museum experience, a dome installation, or an immersive event, a structured planning process can help deliver a more reliable and engaging result.
At Visual GAP, we develop projection-based experiences for architecture, monuments, museums, domes, water screens, and immersive environments. Visit our website to explore our services and discuss your project requirements.
Frequently Asked Questions
How do you plan a projection mapping project?
Start by defining the objective, surveying the location, measuring the projection surface, selecting equipment, planning content, preparing the budget, and scheduling installation and testing.
What equipment is needed for projection mapping?
Depending on the project, you may need projectors, suitable lenses, playback systems, mapping software, cables, mounting equipment, and technical support.
How long does a projection mapping project take?
The timeline depends on the scale of the installation, content complexity, equipment availability, site access, and installation schedule. Large architectural projects generally require more planning and testing than small indoor setups.
Why is a site survey important?
A site survey helps establish surface dimensions, projector positions, lighting conditions, access requirements, and potential technical challenges before installation begins.